- Free Articles
- Shop
- Workshops
- The Dance Educator Series
- L1 – The Fundamentals
- L2 – Pointe Intensive
- L2 – Flexibility Intensive
- L2 – Training Turnout in Tiny Dancers
- L3 – Foot & Ankle Injuries in Dancers – NEW
- L3 – Hip Injuries in Dancers
- L3 – How to Train Extreme Mobility Safely
- Upcoming Workshops
- Workshop FAQ’s
- Workshop Testimonials
- Host Application Form
- Dance Teacher & Health Professional Directory
- Members Areas
- Cart
- My Account
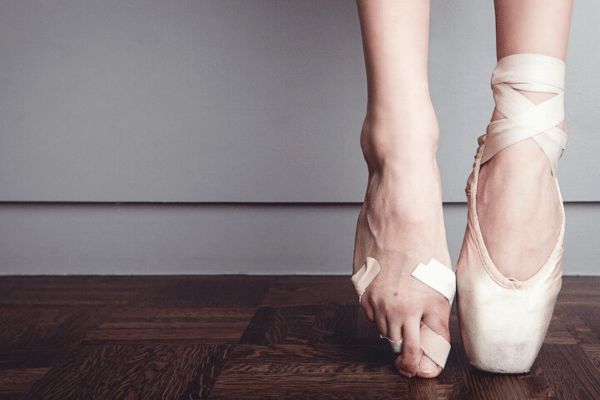
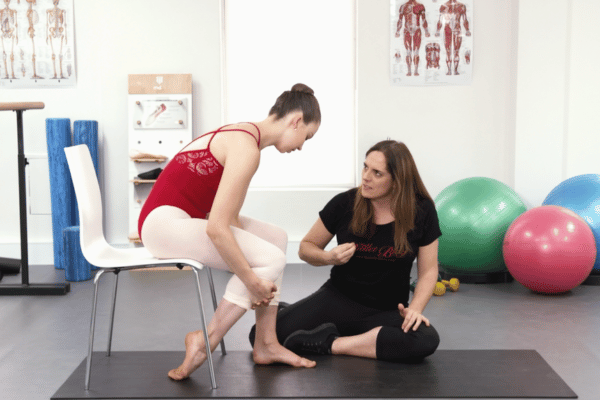
How do you Fit Pointe Shoes Correctly?
Having pointe shoes that fit well can make all the difference in you loving or hating pointe work, so it is important to get it right from the beginning.
Ill-fitting shoes can result in not only pain and discomfort while dancing, but also black toenails, blisters, and stress fractures in the toes. I have made a video on how to fit pointe shoes, so feel free to watch this...
All brands make several different shapes and styles of pointe shoes, which are designed for different people and different uses. This is often very confusing for first-time buyers, so if at all possible get your dance teacher, or an experienced dancer to go along to the fitting with you. The fitters in various stores can range from exceptional to very average, so it is a good idea to get a name of a good fitter on the recommendation of someone you trust.
While the person who fits your shoe should check all of the following things, it is good to know what to look for, and to feel yourself. The fitter can look at how the shoe looks from the outside, but only you can feel what is going on inside.
If possible, ask your teacher to come with you the first time you get your pointe shoes fitted, so that they can check the fit. If they cannot go, always check the fit of the shoes with them before you sew on the ribbons, break in the shoe or dance in them. If you get them dirty by wearing them around the house, they may not be able to be returned to the store, and it can get to be a very expensive exercise.
Each part of the pointe shoe has a name. Try to learn the names of different parts of the shoe before you head to the store for the first time. That way you’ll know what the fitter is talking about if she asks “Is that vamp too high?”. There are many sites online that can help you with this. Always try the shoe on with any padding or ‘Ouch Pouches’ that you will wear while dancing, and check the shoe in each of the following positions.
- Check the fit of the box – The foot should fit snugly in standing; with the toes not too squashed in (They should be able to lie flat). There should be no bulging of the skin over the top edge of the shoe in standing. The top of the box should sit against the skin of the top of your foot. You should be able to slide the tip of your finger in to the shoe over your toes, just. If the box is too round for a flat foot, there will be more of a space here. You can flatten the box slightly, but it will also alter the width
- Take a look at the length of the wings. The wings should come up to the side of the big toe joint. If they are too short, the box will pull the big toe in on an angle and may cause a bunion to form. If they are too long, it may be hard to work properly through the demi-pointe.
- Check the position of the heel of the shoe. The satin of the heel should come 7/8 of the way up your heel bone. Too high, and you may get problems with the attachment of your Achilles tendon attachment. Too low, and you will get frustrated with the heel of the shoe popping off when you rise.
- Watch the length of the vamp, the front of the shoe. If the vamp is too long you will not be able to rise through the demi-pointe effectively. If it is too sort for long toes however, you will feel like you are falling out of the front of the shoe.

5. Plie in Second - When you plie in a wide second position, the foot is at its longest and widest, so it is important to check that there is enough room in the shoe for your foot while dancing. Your toes should stay long in the shoe, and just touch the end of the shoe at the depth of your plie. If you have very short toes, you may need to pad up inside the box of the shoe to get a nice line of the shoe, and a correctly fitting box.
6. Check the alignment en pointe - It is important to check the fit of the shoe in an upright position before putting any weight on it. Place the tip of one shoe on the floor, with your weight on the other foot. Press down slightly to check the fit of the box. The foot should be supported in the box, and not sink down too much. Check the amount of satin at the back of the heel. If the foot has slid forward in the shoe, because the shoe is too wide, there will be more satin. If the top of the foot is bulging out, the box is too small. Make sure that both the big and little toe knuckle joints are supported by the wings. If they are too short the top of the wings will cut in and give an unsightly line to the toe of the shoe.
7. Check the length of the shoe - Check the length of the shoe by peeling the satin of the shoe off the heel and folding it back under the shoe. Place the foot back en pointe, and check where the sole finishes. The end of the sole/shank should be just short of the end of the heel. If the shoe is too long (as in the picture on the right), there may be bagging of the satin at the back of the shoe, as the satin is cut to cup the heel. If the shank is too short, however, the foot will tend to wobble more, and the satin will pull too low. This results in the back of the shoe often popping off when rising from demi to full pointe and can be very annoying.
8. Check the position of the shank - Look to see that the shank sits in line with the sole of the foot when the foot is en pointe. If the shank of the shoe is twisting, check the alignment of the foot first. As long as the box is sitting square and the foot is in good alignment, it should be ok. Often twisting of the shoe is due to the shank not conforming to the shape of the arch and can be remedied by breaking in the heel of the shoe before wearing. However, the shank may also twist on the foot if the box is too narrow, so recheck this area again.
Once you have a good fit, you may try weight-bearing through the shoe by stepping up onto pointe. Hold onto the back of a stable chair or bench, and place one foot en pointe. Put some weight through that shoe and then bring the other foot up onto pointe. Make sure your toes are pointed long in the shoe and that there are no areas of severe pressure on any toe. Isolated areas of pressure may be solved by use of specific padding in the shoe, but should be avoided with a good fit if at all possible.
Pointe Resources
If you are looking to delve deeper into this topic, check out the following programs:
- The Perfect Pointe Book: This course was originally designed to help students and dance teachers safely prepare for pointe work. The four stages of tests and exercises within the book are ideal for pre-pointe preparation classes, students close to achieving pointe shoes and students already en pointe looking for extra strength and technique training.
- Pointe Range: This online program comprises of 41 clear and concise videos, totalling just under 2 hours play time, this course begins with a series of assessments to establish exactly what structures are restricting your pointe range. It then explores a diverse array of massage techniques, joint mobility exercises and fascial mobilisers to safely improve your pointe range. This is followed by an in depth look at retraining all of the muscles that stabilise the foot and ankle to allow you to actually use your new found pointe range in class.
- Pointe Intensive: This online virtual workshop is designed for both Dance Teachers & Health Professionals working with dancers. This three day Intensive will give you the most up-to-date advice in the industry to help you understand your students’ needs, analyze their differences, and them you the tools to help your students become the best dancer they can be.
")
")

Can Students With Restricted Range Ever Go En Pointe?
Hi Lisa, If a student does not have good flexibility…

Does Pointe Work Hurt?
While pointe work is not exactly like wearing slippers, it…

Improving Beginner Pointe Work
Improving Beginner Pointe Work Teachers often wonder how to get…


Stretches To Improve Pointe Range
Dear Lisa, Would you happen to have any foot stretches…